How to create a private npm package on GitLab
This guide will teach you how to create your own private npm packages on GitLab. Having code that you often reuse from project to project is difficult to maintain, and it is annoying having to copy-paste it all the time. Making those chunks of code into npm packages can help you to easily install them on any project, maintain and update their codebase and apply updates on projects where they are used. Keep reading and find out what to do.
Project setup
First things first, you need to create a new repository on GitLab, which will be dedicated for your npm package. Once you have created a repository, clone it.
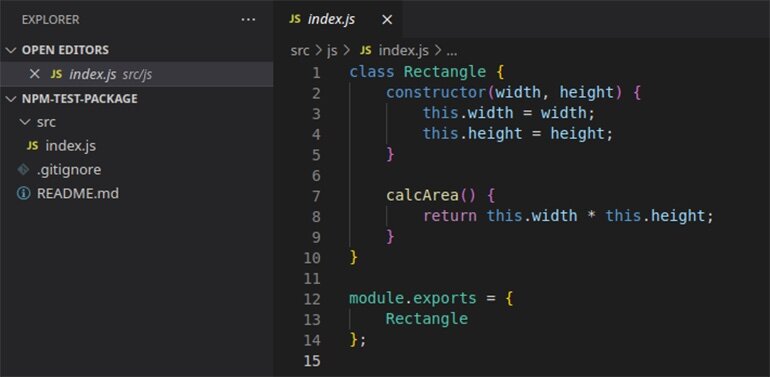
After that, create a folder structure. For the purposes of this guide, we’ll have an src folder with an index.js file containing a simple Rectangle class with a constructor that accepts width and height, and a method that calculates the area. At the end class is exported as a module.
Since we are using ES6 JavaScript, we need to transpile the code. For that, we are using Laravel Mix, but you can use just Webpack (or any other tool you prefer). The important thing is that you configure the output by setting libraryTarget to umd and library to NameOfYourLibrary. That exposes your library under all the module definitions, allowing it to work with CommonJS, AMD, and as a global variable.

Package.json
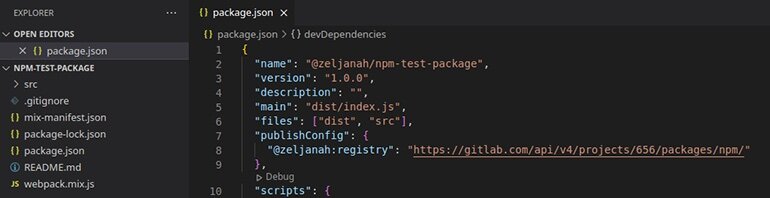
If you already have the package.json file, you will need to adjust a few things, but in case you don't, you can run npm init to set it up or create it manually. The first thing you should check is the name; it should be @your-gitlab-username/your-repository-name.
After that, make sure that you have a version; starting version should be 1.0.0. Next are main and files; main is the path to the main file that your library will be imported from and files is the array of folders or files that should be included in the package. In our case, we have main set to dist/index.js, which is a transpiled and minified version of the index.js file from the src folder, and files containing dist and src folders.
Last but not least is publishConfig which should be:
"@your-gitlab-username:registry": "https://gitlab.com/api/v4/projects/your-project-id/packages/npm/".
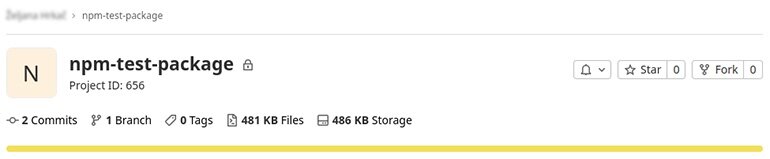
If you have GitLab on your custom domain, then replace gitlab.com with your own domain. As for the project id, it can be found on the repository page right under the repository name.
.npmrc file and token
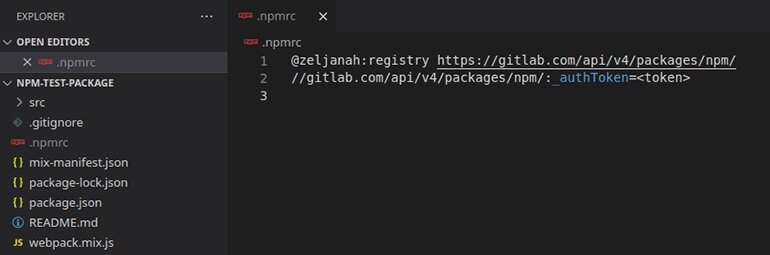
Create a file named .npmrc and add the following lines to it:
@your-gitlab-username:registry https://gitlab.com/api/v4/packages/npm/
//gitlab.com/api/v4/packages/npm/:_authToken=<token>
Before we go into creating and adding a token, you should add the .npmrc file to .gitignore because files containing tokens shouldn't be committed to a repository.
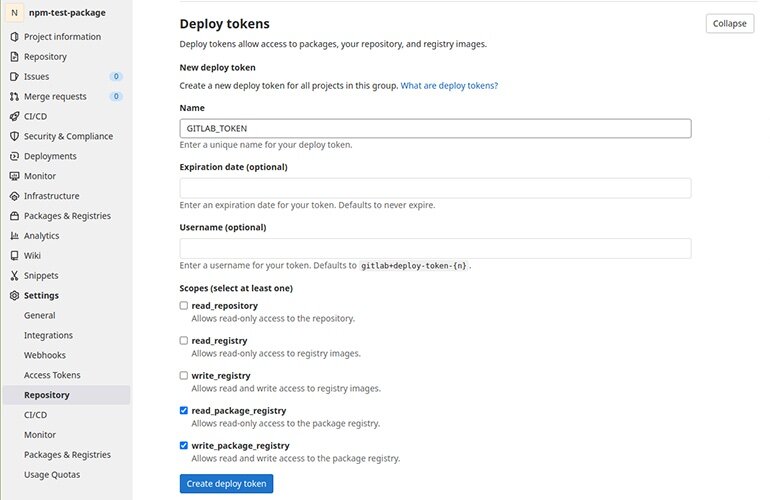
To create a token, you need to go to the repository page and then Settings -> Repository and expand the section Deploy tokens. There you can create a new token by adding a name and make sure to check read_package_registry and write_package_registry.
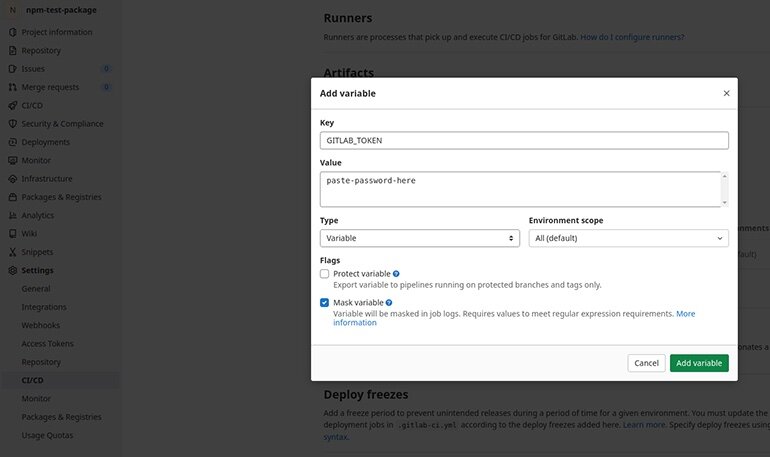
Once you have created a token, you will see the password for it. Copy the password, go to Settings -> CI/CD, and expand the section Variables. There you can add a new variable, add some name under the key for value, paste the password and check Mask variable checkbox.
In the .npmrc file, replace the <token> with the actual token/password.
Publishing npm package
To publish an npm package, you need to have a deploy job and a runner that will run it. If you already have a runner, you can use that one; for that, check Settings -> CI/CD -> Runners, or if you don't have it there, you'll find a guide on how to set it up. For a deploy job, create a .gitlab-ci.yml file with the following code:
image: node:latest
stages:
- deploy
deploy:
stage: deploy
script:
- echo "//${CI_SERVER_HOST}/api/v4/projects/${CI_PROJECT_ID}/packages/npm/:_authToken=${CI_JOB_TOKEN}">.npmrc
- npm publish
environment: production
Now you can commit and push changes. Then go to your repository and check the deploy job status (CI/CD -> Jobs). It will tell you if the job was successful or failed and what went wrong. One important thing to note is every commit you make to the main/master branch, you have to also update the version in the package.json file; otherwise, the job will fail.
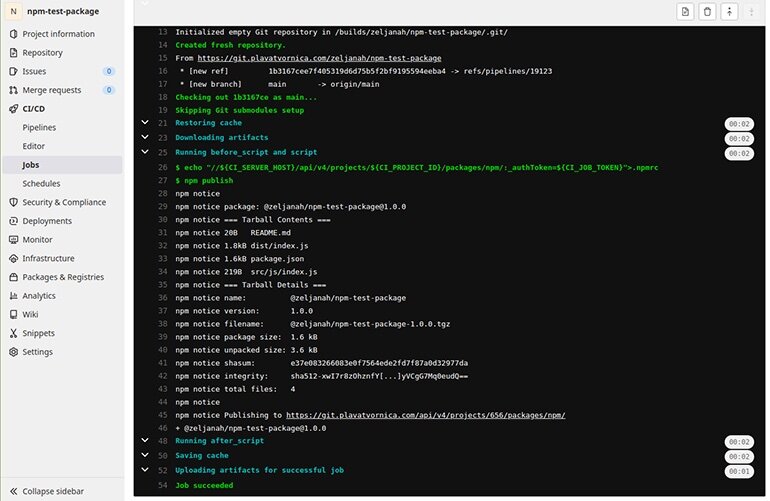
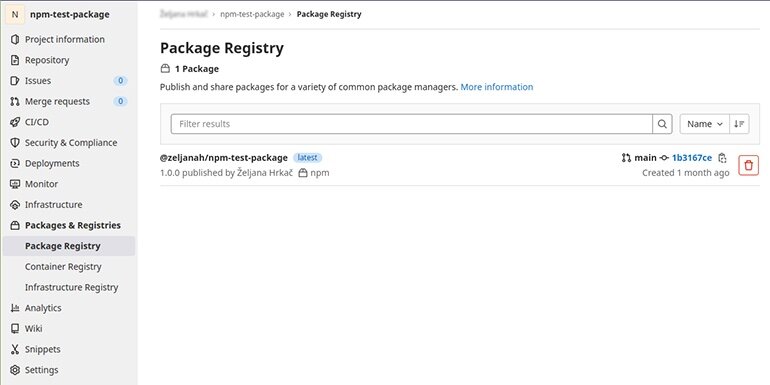
Once the job is done, and it was successful, your npm package is published. You can check it by going to Packages & Registries.
Using the npm package on other projects
You can install this npm package on any of your new or existing projects. What you need to do is create a .npmrc file inside of that project by running the following command:
echo @your-gitlab-username:registry=https://gitlab.com/api/v4/packages/npm/ >> .npmrc
Then open the .npmrc file and add the following //gitlab.com/api/v4/packages/npm/:_authToken=<token> at end, replace <token> with the actual token. You can easily find the token anytime by going to your npm package repository and then Settings -> CI/CD -> Variables and copy it from there.

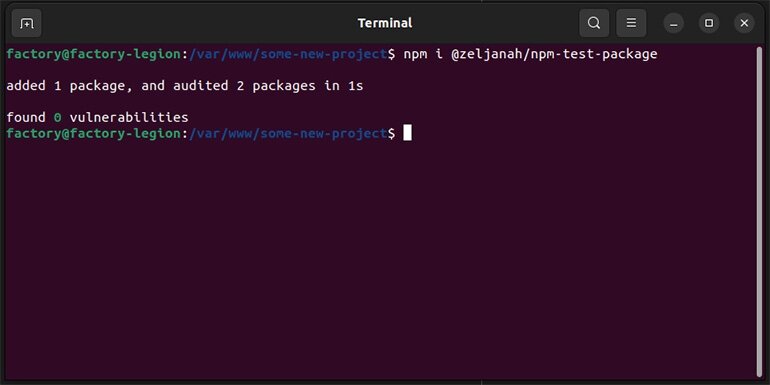
Once you have done this, you can install the npm package by running the following command:
npm i @your-gitlab-username/your-npm-package-repository-name
And then import it in your project JavaScript file:
import YourLibrary from
'@your-gitlab-username/your-npm-package-repository-name';
Now you have everything you need to create your own private npm packages on GitLab! I hope this guide will be helpful to you, and if you have any questions about this topic, we'll be happy to answer them, so feel free to reach out.